×

Inventory Pricing Tool

Inventory Pricing Tool

1

Cancel & Close

1. Cancel & Close
Closes the inventory Pricing Tool window without making any changes.
2

Save & Close

2. Save & Close
Save changes made to the checked vehicles in the Inventory List.
3

Print

3. Print
The "Print" button will print the Inventory list shown on the screen.
4

Preview

4. Preview
The "Preview" button will show a preview of the Inventory List before printing.
5

Check All

5. Check All
Checks all the check boxes for each vehicle in the Inventory List.
6

Un-Check All

6. Un-Check All
Unchecks all the check boxes for each vehicle in the Inventory List.
7

Set Pricing Parameters

7. Set Pricing Parameters
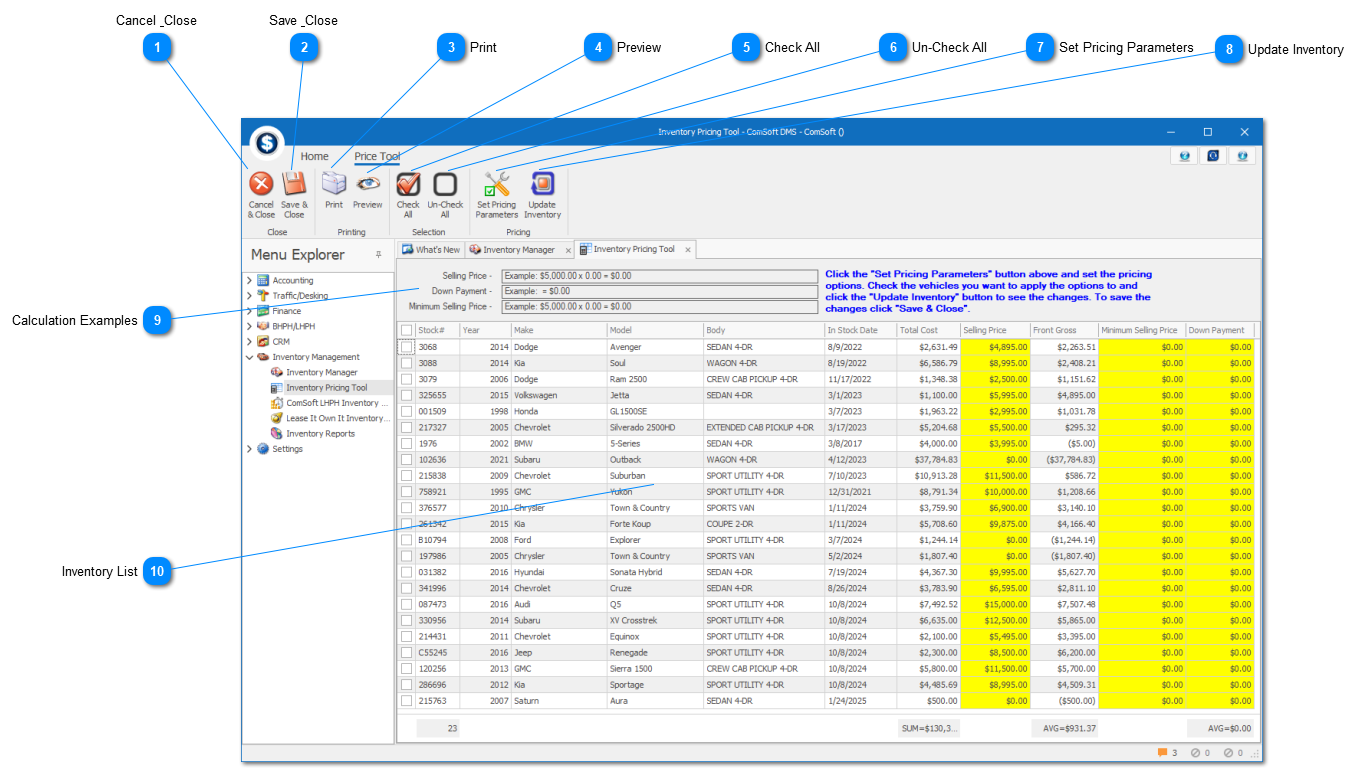
The "Set Pricing Parameters" button will open the Inventory Pricing dialog box where you can set the rules of how pricing, down payments and minimum selling price will be calculated.
8

Update Inventory

8. Update Inventory
The "Update Inventory" button will begin the calculation process change the numbers for the checked vehicles in the Inventory List.
9

Calculation Examples

9. Calculation Examples
This area will give you an example of each rule that you have defined in the Inventory Pricing window will be applied to each checked vehicle in the Inventory List.
10

Inventory List

10. Inventory List
This is a list of your inventory. The yellow columns can be edited directly without setting parameters or updating the inventory.
NOTE: Only checked vehicles in the Inventory List will be updated and saved.