To properly display this page you need a browser with JavaScript support.
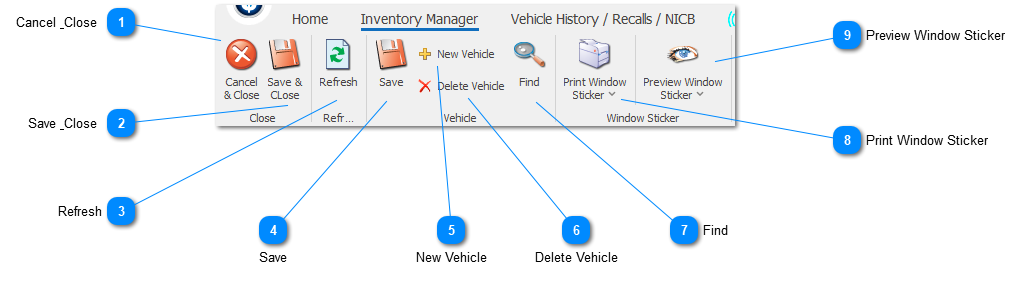
Inventory Manager Toolbar
Cancel & Close The "Cancel & Close" button will close the Inventory Manager window without saving any changes.
Save & Close The "Save & Close" button will save all changes made to the currently selected vehicle and close the Inventory Manager window.
Refresh The "Refresh" button will reload the inventory list. This is handy if another user has added or changed vehicle information.
Save The "Save" button will save any changes made on the currently selected vehicle without closing the Inventory Manager window.
New Vehicle The "New Vehicle" button will add a new inventory vehicle to the system. Once added the details of the vehicle can be edited in the Details
Delete Vehicle The "Delete Vehicle" button will delete the currently selected vehicle. NOTE: Depending on a users security level this button may or may not be available.
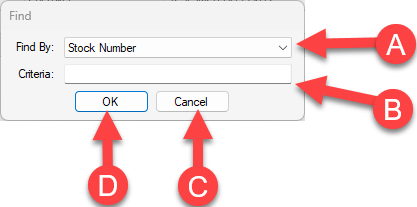
Find The "Find" button will bring up a dialog box as shown below.
The "Find By" field is a drop down where you can choose what you would like to search by.
B. The "Criteria" field is where you would enter that you are searching for.
C. The "Cancel" button will close the dialog window and return you back to the Inventory Manager screen.
D. The "OK" button will perform the search.
Print Window Sticker The "Print Window Sticker" button will show a list of possible documents that you can print to your printer for the selected vehicle.
Preview Window Sticker The "Preview Window Sticker" button will show a list of possible documents that you preview and see what it will look like for the selected vehicle before you print it.