Add Vehicle To Inventory (No Accounting)
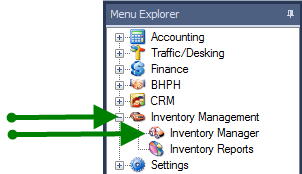
1. Click on Inventory, Click on Inventory Manager.
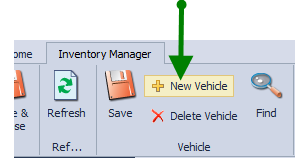
2. Click on New Vehicle.
Note: Many of the fields on this screen are optional. Enter all information that is pertinent to your business.
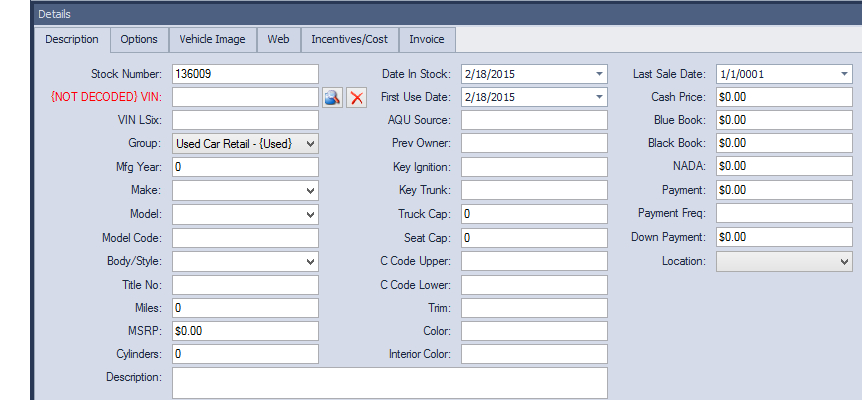
3. Depending on the default settings you choose, the Stock Number will populate one of three ways
- blank field, enter manually
- last 6 of VIN
- Sequentially
Regardless of the way it auto populates it can be changed by typing in the field
4. Type in the VIN (Vehicle Identification Number), click on  . For more information click Decode a VIN
Note: Bronze package does not contain a VIN decoder, for further instructions click without VIN Decoder

The VIN will be decoded through CHROME (you must be connected to the internet to do this), the highlighted fields below will populate.
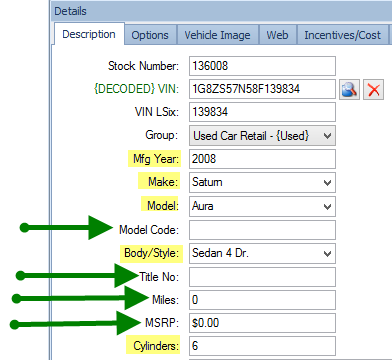
5. Click in box to enter Title No: if you have it. It can be inserted at a later date.
Click in box to enter Miles: currently on odometer of the vehicle.
6. Date in Stock and First Use Date: will automatically default to the current date. Change by using drop down arrow or typing date in the box.
7. AQU Source: click in box to enter where vehicle was purchased from.
Previous owner : click in box to enter name.
Key Ignition and Key Trunk: click in box to enter the Fob key codes.
.

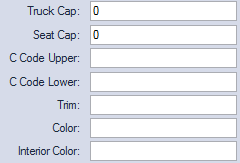
8. Truck Cap: click in box to enter weight capacity
Seat Cap: click in the box to enter seating capacity
C Code Upper and C Code Lower: click in box to enter paint color codes
Trim: click on box to enter color
Color: click on box to enter vehicle color, if chosen in vehicle options it will automatically show here
Interior color: click on box to enter color
9. The Last Sale Date: will default to 1/1/0001 if it has never been in your inventory before. If the vehicle was sold, repossessed and restocked into your inventory then the day of the previous sale will be entered here.
10. Cash Price: click in box to enter the price.
11. Click on appropriate box to enter vehicle values per the sources listed.

12. The following fields are used for Lease and BHPH deals.
Payment: click in box to enter what the vehicle payment will be.
Payment Freq: click in box to enter payment frequency.
Down Payment: click in box to enter required down payment.

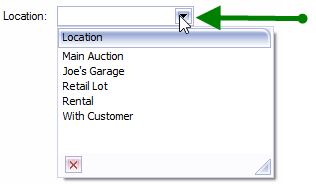
13. Click on drop down menu to choose location of vehicle. Click Inventory Locations Window for more detailed information on creating locations for menu.
14. For instructions regarding Web tab, click
